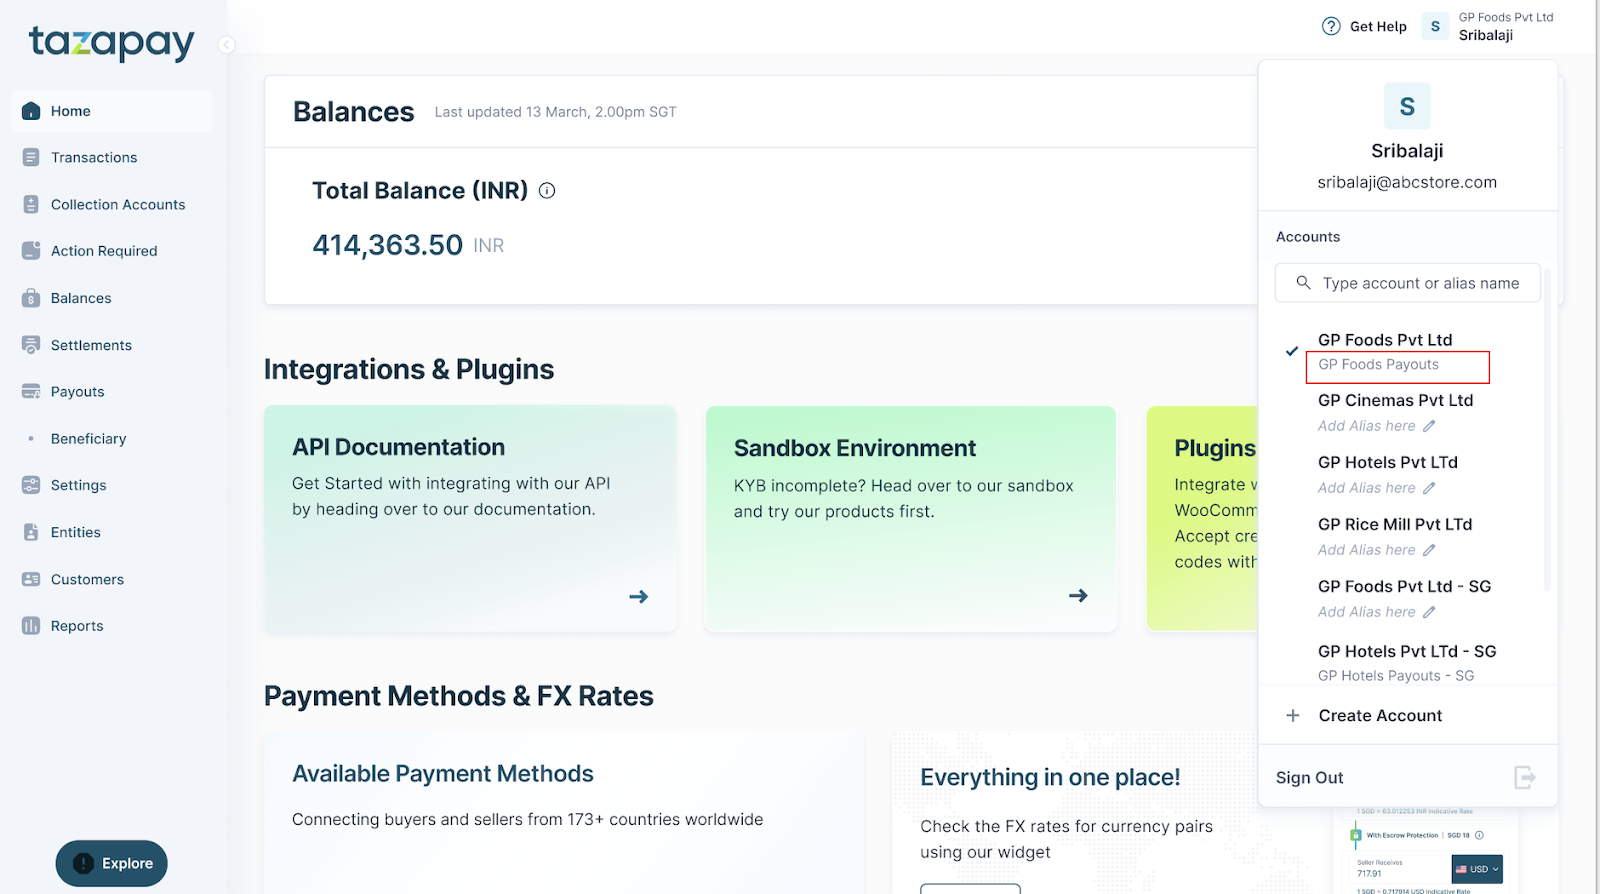
Easily Distinguish Between Multiple Accounts with Customizable Labels
As your business grows, managing multiple accounts efficiently becomes essential. To help you keep things organized, we are excited to introduce the Alias feature—a customizable label that makes it easier to distinguish between different accounts on your Tazapay Dashboard.
Benefits of Using Account Aliases
With the Alias feature, you can:
-
Differentiate Between Accounts: Assign specific names based on each account’s function, such as payouts, collections, 3DS/Non-3DS, or any other financial activities.
-
Enhance Organization: Keep your dashboard organized by labeling accounts according to their purpose.
-
Improve Navigation: Quickly identify and switch between accounts, saving time and reducing confusion.
Note: Aliases are only visible to you and your team within the Tazapay Dashboard and are not publicly visible to your customers.
Step 1: Log In to Your Tazapay Dashboard
-
Access Your Dashboard:
- Navigate to dashboard.tazapay.com. and login with your credentials.
Step 2: Access the Account Details
- Navigate to the Profile Icon:
- Click on the Profile icon located at the top right corner of the screen.
- View Account Details:
- In the dropdown menu, select the account for which you want to set or edit an Alias.
Step 3: Add an Alias to Your Account
For Accounts Without an Alias:
- Add Alias:
- Click on the "Add Alias" option displayed below the Account Name.
- Set Custom Alias:
- Enter your desired Alias in the provided field.
- Click "Save" to confirm.
Step 4: Edit an Existing Alias
For Accounts That Already Have an Alias:
- Edit Alias:
- Hover over the existing Alias displayed below the Account Name.
- An "Edit" option will appear.
- Modify Alias:
-
- Click "Edit" and update the Alias as needed.
- Click "Save" to apply the changes.
Step 5: Add an Alias When Creating a New Account
-
Create a New Account:
- During the account creation process, you will have the option to set an Alias.
- Enter a unique Alias to define the account's purpose from the start.
Step 6: Manage Aliases via Account Settings
- Navigate to Settings:
- Go to Settings > Account Settings.
- Access Account Alias:
- Select "Account Alias" to view or edit Aliases for all your accounts.
Step 7: Use the Search Bar for Easy Management
-
Search by Alias or Account Name:
- Use the search bar in the Accounts section to quickly find accounts by Alias and Account Name.
If you have any questions about setting up or using the Alias feature, don’t hesitate to contact our support team at support@tazapay.com. We're here to help!
