
Install and configure Tazapay's WooCommerce plugin from your admin panel in a few simple steps.
Please ensure that you have created a Tazapay account here and submit your KYB before proceeding. Your API key and secret, which are required for the use of the WooCommerce plugin, can only be accessed once your KYB is approved.
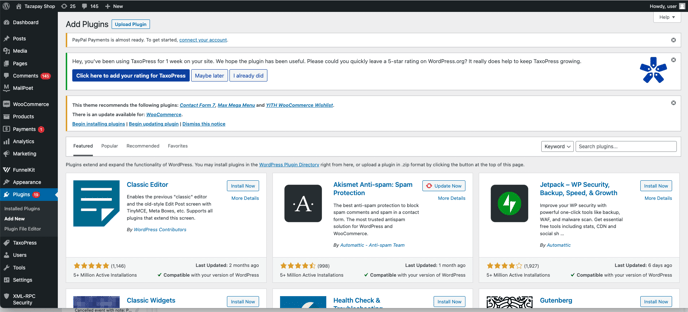
Step 1: Login to your WordPress admin panel
- Click on "Plugins" on the left navbar.
- Click "Add New" on the dropdown list or on the Plugins page
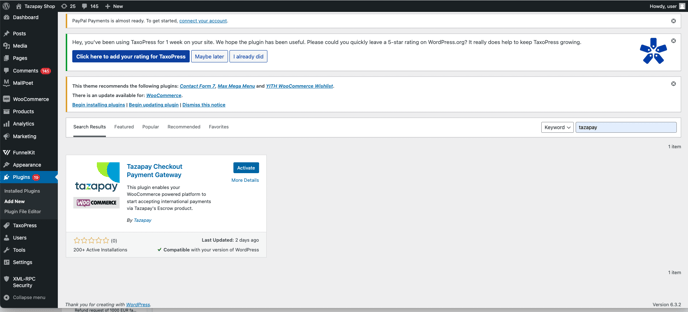
Step 2: Search and install Tazapay plugin:
- Use the search bar to look for "Tazapay".
- Click on "Install Now".

Step 3: Activate the Plugin
- Wait until WooCommerce finishes installing Tazapay.
- Click on "Activate".
Step 4: Navigate to the WooCommerce tab on the left navbar and click on Settings.
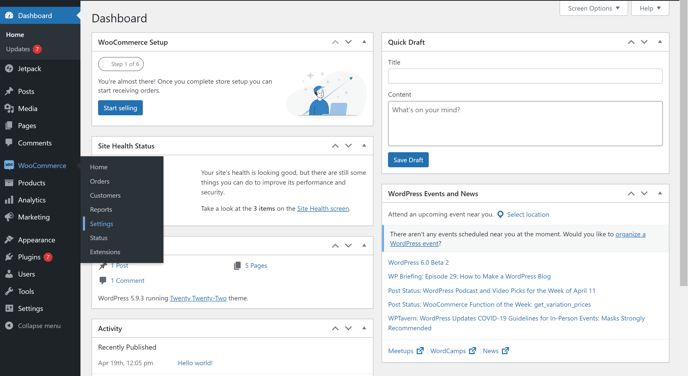
Step 5: Click on Payments on the top tabs.
Step 6: Modify your Tazapay plugin settings
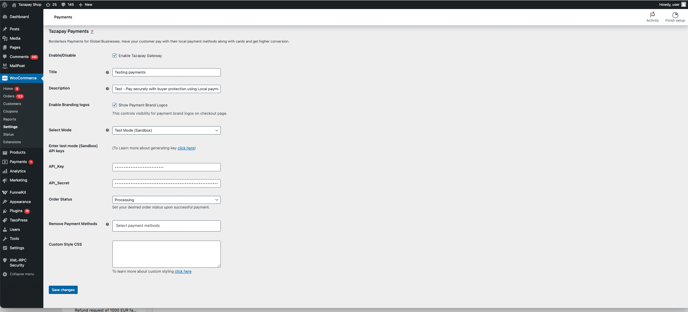
- Ensure that "Enable Tazapay gateway" is ticked
- Choose Mode: Select between two modes:
- Test Mode (Sandbox) for trial.
- Live Mode (Production) to take the gateway live.
- API Key and Secret:
Ensure you fill in the correct API key and Secret.
Note: API key and secret for Sandbox and Production are different. Retrieve both by logging into your Tazapay account. - Order Status: Determine how you'd like a transaction to be marked after a payment has been made:
- "Processing" (typically used for physical goods requiring shipping).
- "Completed" (typically for digital goods delivered instantaneously online).
-
Remove Payment Methods:
- You'll be given selections of payment methods by collection currency.
- Disable certain payment methods from appearing on your checkout screen.
-
Custom Style CSS:
- Use the Custom Style CSS box to edit the look and feel of your checkout.
Step 7: Click on "Save changes" to finalize your settings.